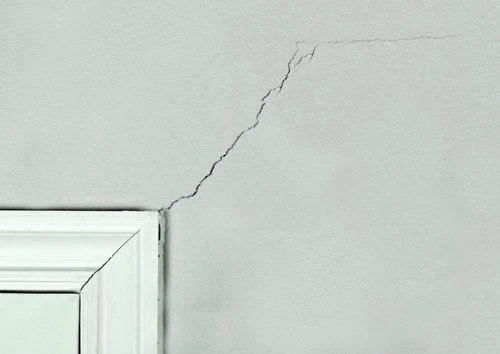
Drywall cracks can make the
entire room look ugly. To make your house beautiful again, follow these simple
steps to repair drywall cracks. We'll also tell you how you can use cheap
storage units to organize your belongings and make your home look even prettier!
Step 1: Protect
the furniture by putting it away in storage units
This step is relevant if the
drywall cracks are extensive or if they are all over the place. You should be
aware that drywall cracks often appear with other defects like doorway cracks,
cracked tiles, and sloping floors. All this could mean an aesthetically
unpleasing house. If that's the case
with you, it might be a good idea to protect your furniture from any materials
used during the repair. Moving it away to storage units will not only protect
it but also give you the room to work comfortably.
Step 2: Gather
the materials and tools needed
It's a good idea to gather all the tools and materials you'll need before you start working on the cracks. You'll save time, and the process will go much smoother.
Following are the tools you'll need:
- a mud pan (to hold the joint compound)
- a utility knife
- a taping knife
- drywall sanding mesh
- a 6-inch putty knife
You'll also need the following materials:
- paper drywall tape
- joint compound
- painter's tape
- primer
- some paint (that matches your wall color)
Step 3: Prepare
the area and open up the crack
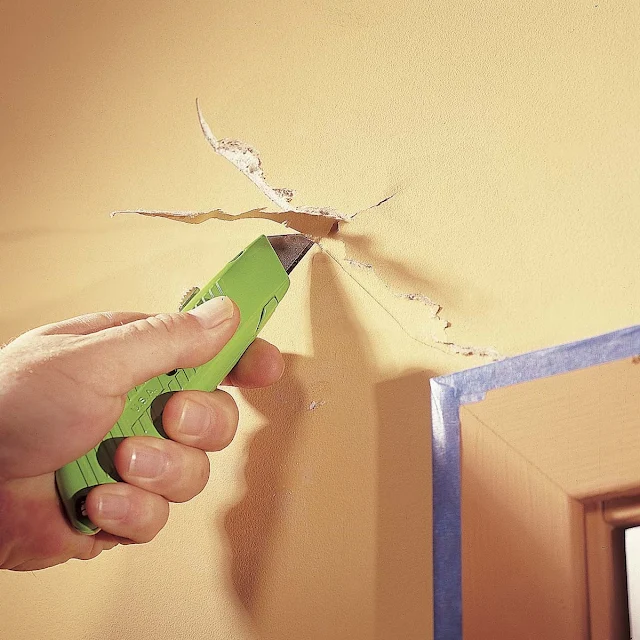
Before you begin the repair, it's essential to protect any woodwork that's around the crack. Drywall cracks often appear near doors and windows, so you'll likely have some woodwork around the crack. Use painter's tape over the woodwork to protect it.
Also Read: Add Colour and Warmth to Your Living Room – Tips and Tricks to Follow
You also want to open up the
crack. This involves running a sharp tool like a utility knife, a screwdriver,
or even an old key, across the length of the crack firmly. The idea is to get
to the sound drywall before beginning repairs. Once you open up the crack,
clean any dust or debris left behind using a wet cloth or a vacuum cleaner.
Step 4: Seal
the joint using drywall tape
Once you have a clean, open crack, apply a strip of drywall tape over its entire length. Drywall tape will help prevent future cracks. Before using the tape, you might want to coat the crack with a thin layer of joint compound to embed the tape within it.
After applying the tape, coat it
with a thin layer of joint compound. Do this even if you have applied the joint
compound before applying the tape. You want to feather out the joint compound
to a little beyond the strip's edges. Use the 6-inch putty knife to get rid of
excess compound or air trapped in the strip of tape. Let the coat dry
completely.
Step 5: Apply
second (and third) joint compound coats
Once the first coat is dry, use a
putty knife to smooth it out and eliminate any bumps or edges. Then proceed to
apply the second coat of joint compound. You can do this with either the putty
knife or the taping knife. Let the second coat dry, and smooth it out like you
smoothed the first coat before applying the third coat. When you apply the
third coat, make sure you feather it out 5 to 6 inches beyond the strip's edges
to make the joint undetectable. Let the third coat dry.
Step 6: Scrape,
sand, and prime the final coat
Once the third coat is dry, scrape it to smooth it out like the first two coats. Then use the drywall sanding mesh for sanding the coat. You can also use regular sandpaper for this purpose, but a dedicated sanding mesh with a handle is a lot more comfortable when you're making a lot of repairs.
Also Read: Why “Granite Countertop” Is the Ultimate Choice for the Homeowner
Once sanded, dust the patch and apply some primer. Thoroughly applying the primer is essential because if you paint over the patch without it, chances are the paint over the patch will have a different gloss than the rest of the wall. This difference in gloss can become especially noticeable in bright sunlight, so if your room has a lot of sunlight, a primer becomes even more critical.
Once the primer has dried, you
can paint the patch and marvel at the fantastic job you did!
Bonus step: Find cheap storage unit
In the beginning, we discussed how you might want to move your furniture to storage units before making repairs. Since you're already concerned about the aesthetics of your house, you should know that storage units can also be used to improve how your house looks. All of us have more stuff than we need, and this can clutter up our homes. If you have clutter that you cannot entirely discard, you should consider storing it in cheap storage units.
If you're new to storage units, you can think of them as "rooms" that you can rent and use for storing items that you rarely use, or furniture before making repairs to your house. Many companies offer storage units, and it can get challenging to find cheap storage units. One excellent resource for finding cheap storage units is The Self Storage Outlet. You can go to their website, enter your requirements, and they'll dig out cheap storage units based on your needs, so you don't end up spending extra money.
One problem many people face with storage units is transporting their belongings to them. If you're going to move your furniture to them, you'll undoubtedly need some help. bySTORED is an especially good option for this because not only does it offer cheap storage units, but it will also pick up your stuff from your doorstep, transport it to its storage units, and return it to you whenever you need it.
And there you have a perfect, crack-less wall, and a prettier house if you decided to follow our tip about cheap storage units!
Meta Description: Repair wall
cracks? The first thing you need to do is put away your furniture in storage
units. Find out how to find cheap storage units and repair your wall!


0 Comments